
How to Shoot Tethered: A Beginner's Guide
One of the best ways to improve your photography has nothing to do with buying another camera or lens.
It's learning how to shoot tethered.
When I photograph portraits or work on commercial assignments, being able to see an image on a larger screen changes how I approach the entire shoot. I can check focus, evaluate lighting, catch distracting details, and make adjustments before I've taken another hundred photographs.
Just as importantly, it gives the people I'm working with an opportunity to see what we're creating. A client can provide feedback, a stylist can catch something that needs fixing, and everyone can leave the set with a better understanding of the work we've produced.
That doesn't mean you need to spend thousands of dollars building an elaborate workstation. You can start with a compatible camera, a computer, the right software, and a reliable connection.
Here's how I'd get started, what I'd avoid, and why tethering has become such a valuable part of my photography workflow.
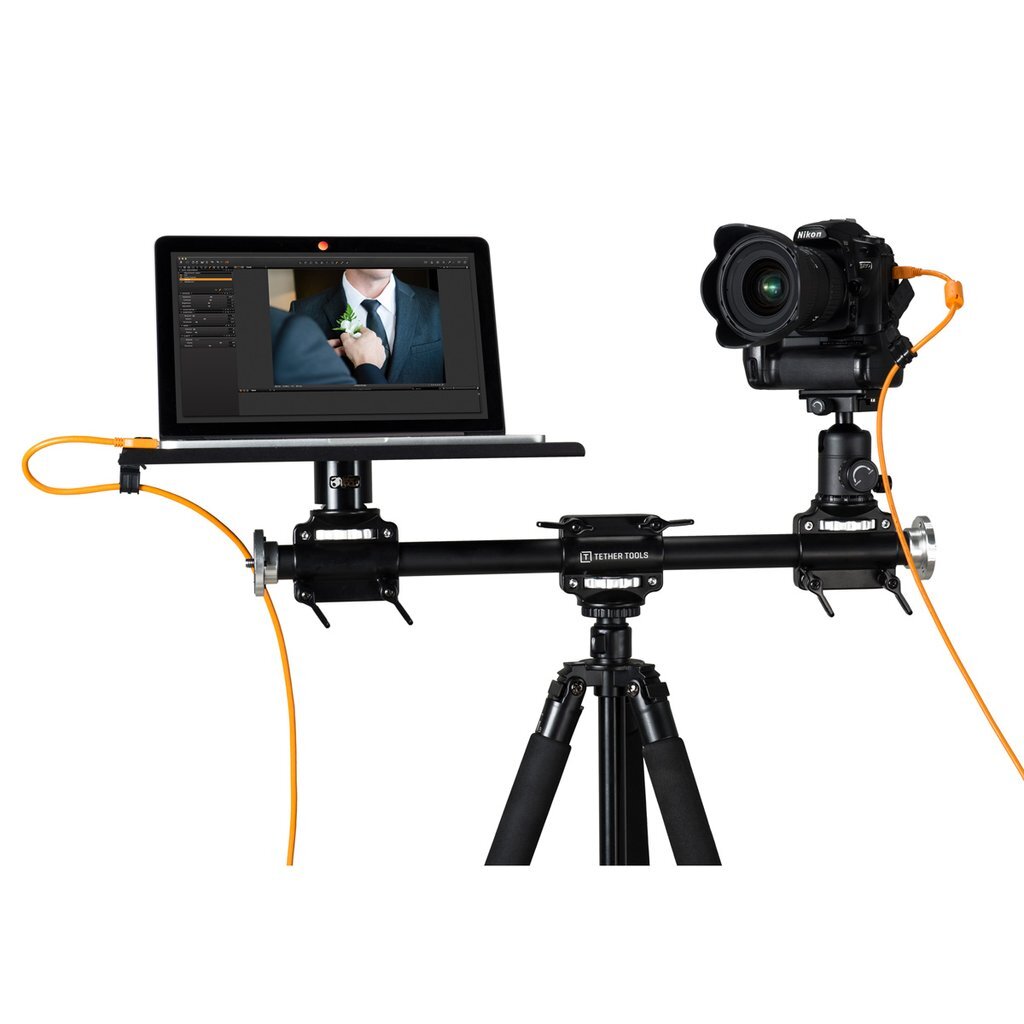
What Is Tethering?
Tethering is the process of connecting your camera to a computer or compatible device so that photographs can be transferred and displayed as you take them. Depending on the camera and software, you may also be able to control camera settings, trigger the shutter, and use live view remotely.
Instead of relying exclusively on the small screen on the back of your camera, you can inspect your work on a much larger display. That makes it easier to evaluate everything from the quality of your lighting to whether your subject's eyes are actually in focus.
For me, the real value isn't simply getting a bigger picture. It's having the information I need to make better decisions while I'm still photographing.
Catch the Small Details.
A larger display makes it easier to inspect eye sharpness, clothing, hair, makeup, and anything else you might miss on the camera screen.
Evaluate the Whole Frame.
Review highlights, shadows, exposure, color, and background distractions before committing to an entire sequence of photographs.
Bring the Team Into the Process.
Clients, stylists, art directors, and subjects can review the work without passing the camera around the set.
Keep Your Shoot Organized.
Transfer images into a named session, review your selections, and build a more organized handoff for editing and delivery.
What Do You Actually Need?
One of the reasons I like teaching tethering is that you can build a perfectly useful setup without buying every accessory on the market. Start with the equipment you already own and add the things that solve an actual problem.
Confirm that your camera supports remote or tethered shooting with your chosen software.
Use a computer that meets the software requirements and has enough available storage for your files.
Choose software based on your camera model and how you prefer to review and organize photographs.
A suitable data-capable USB cable is the easiest starting point; supported wireless systems are another option.
Which Software Should You Use?
There isn't one application that's perfect for every photographer. The best choice is the one that supports your camera and makes sense for your workflow.
A practical option if you already manage and edit your photography in Lightroom. It supports tethered capture with selected Canon, Fujifilm, Nikon, and Sony cameras. Check the supported camera list before setting up.
Check Camera Compatibility ↗A strong option for photographers who want a dedicated tethered-capture and on-set review workflow. Available controls and features depend on the camera model.
Explore Capture One ↗Sony's own solution for compatible cameras includes remote shooting and image review. It's worth investigating if you shoot Sony and want to start without purchasing additional software.
View Sony's Software ↗How to Shoot Tethered in Six Steps.
You don't need to make this complicated. The goal is to create a setup you can repeat without having to troubleshoot everything from scratch each time.
-
Check Your Camera and Software.
Before you connect anything, confirm your exact camera model is supported. If you're using a Sony camera, look for the appropriate PC Remote setting in its menu. The setting names and connection options vary by model.
-
Prepare Your Computer.
Open your tethering application, create a session or destination folder, and make sure there's enough free space for the photographs you're about to capture. Give the folder a recognizable name rather than leaving everything in a generic location.
-
Connect the Camera.
Plug a compatible data cable directly into the correct camera and computer ports, or follow the connection instructions for your supported wireless setup. If the software doesn't recognize the camera, verify the camera's USB or remote-shooting mode before assuming something is broken.
-
Secure the Cable and Workstation.
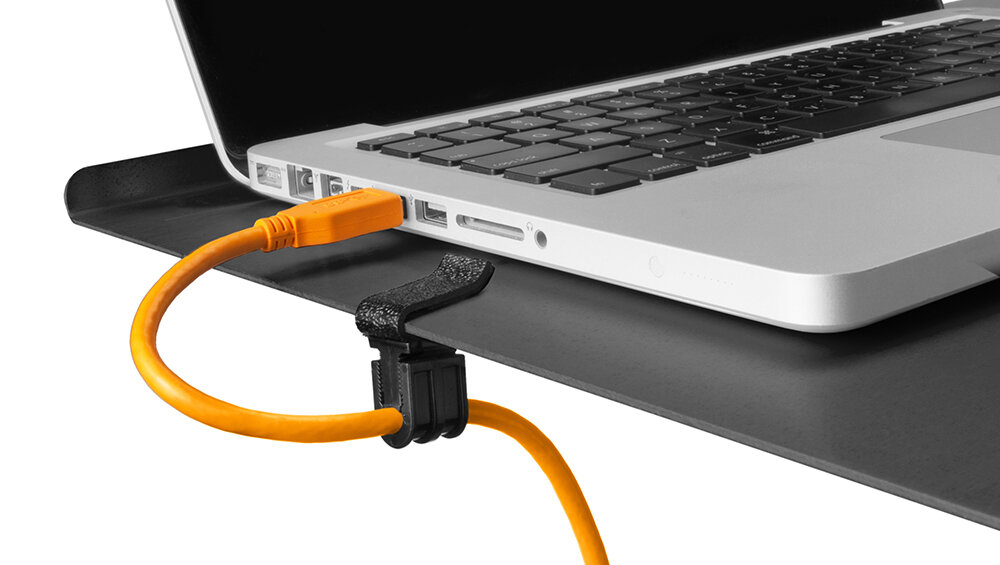
Keep the computer on a stable surface, protect the camera's connector from strain, and route the cable where nobody is likely to catch a foot on it. A damaged camera port can turn an inexpensive setup into a very expensive problem.
-
Make a Test Exposure.
Take one photograph and confirm that it appears on the computer. Check the filename, destination, image quality, exposure, and focus. If you're expecting RAW files, make sure the full-resolution files—not just smaller previews—are being saved where you intend.
-
Shoot, Review, and Protect the Files.
Once the system is working, use it to evaluate the photographs and collaborate with your team. Establish a backup plan rather than assuming that having files on a computer makes them safe. Some systems can save to both camera and computer, but that needs to be verified for your exact setup.

Wired vs. Wireless Tethering.
I generally recommend that beginners start with a wired connection. It's straightforward, avoids some of the variables that come with wireless networks, and makes it easier to troubleshoot when something doesn't work.
That doesn't mean wireless tethering isn't useful. If you're moving around a large location, photographing outdoors, or working in an environment where a cable would be impractical, a supported wireless workflow can be a great solution.
The important thing is to choose the connection that supports the assignment, not the one that sounds more impressive.
Wired Tethering.
Best for: Studio portraits, commercial sets, tabletop photography, and other controlled environments.
Advantages: Typically more predictable file transfers, a straightforward setup, and fewer wireless-network variables.
Trade-offs: Restricted movement, cable length considerations, and a physical connection that needs protection.
Wireless Tethering.
Best for: Compatible cameras and workflows where freedom of movement is important.
Advantages: Fewer cables, greater flexibility, and easier movement between shooting positions.
Trade-offs: Transfer speed, connection stability, and available features depend on the camera, software, files, and wireless conditions.
Five Mistakes I'd Avoid.
Tethering is supposed to make your photography workflow easier. If you spend half the shoot fighting a connection or looking for missing files, you're defeating the purpose.
These are the problems I'd pay attention to before bringing a new tethering setup onto a paid assignment.
-
Buying the wrong cable. A connector that physically fits doesn't necessarily mean the cable supports the data transfer your camera needs.
-
Leaving the camera port unprotected. Use sensible strain relief and route the cable safely. One accidental tug can interrupt the shoot or damage the equipment.
-
Assuming every camera works with every application. Camera support varies, and so do live view, remote control, and file-saving features.
-
Confusing file transfer with file backup. Saving to a laptop isn't the same thing as keeping a second independent copy of the photographs.
-
Testing the setup for the first time in front of a client. Build and test your workflow before the assignment, including what happens if the connection fails.
Why This Matters on a Professional Set.
When you're photographing someone for a commercial campaign, there are usually more people invested in the final image than the photographer and the subject. There might be an art director, stylist, makeup artist, client, or creative team making decisions throughout the shoot.
A tethered workstation gives everyone a shared point of reference. Instead of trying to explain what you're seeing on a small camera screen, you can show them. A stylist can spot an issue with clothing, the client can confirm that the composition supports the campaign, and you can evaluate whether the lighting is doing what you intended.
That's particularly valuable when something needs to change. It's much easier to fix a wrinkle in someone's shirt, adjust a background light, or rethink a pose while everyone is still on set than to discover the issue later while editing.
Of course, there's a balance. I don't want everyone stopping the shoot after every exposure to debate whether they like the photograph. The goal is to improve communication and make the production more efficient, not create another reason for the entire team to stare at a screen.
Used well, tethering helps you make better decisions, collaborate with confidence, and keep the focus where it belongs: on creating excellent photographs.
Better Workflow. Better Photographs.
If you're new to tethering, don't overcomplicate it. Start with a compatible camera, a computer, the right software, and a reliable connection. Learn how to make the system work before spending money on accessories you may not need.
Once you're comfortable, build a workflow around the kind of photography you actually do. You might eventually want a rolling workstation, an external monitor, a wireless connection, or a dedicated assistant managing the images. Those things can be valuable, but they're not prerequisites for getting started.
The purpose of all this equipment is to help you see your work more clearly, solve problems sooner, and create a better experience for the people who trust you to photograph them.
Ultimately, being a better photographer isn't about how complicated your setup looks. It's about the quality of the work you create and how consistently you can deliver it.
Start simple. Build a process you can trust. Then get back to making photographs.